UI/UX Robotics Software Development

Robotic Arm Controller

AJ is a Unity desktop app that lets anyone build complex robot motion sequences visually, no code required. Designed with Jonathan Shulgach, the Carnegie Mellon Ph.D. student who built the hardware control systems.

Role

Lead Product Designer

Timeline

4 months

Platform

Desktop Application

Tools

Unity UI, C#, GitHub, Figma, Linear, Trello

TL;DR

Problem

Robotics has a steep learning curve; programming motion sequences shouldn’t require writing code.

My Role

Lead Product Designer on AJ (Unity/C#/Python) in collaboration with the hardware/control systems lead.

Constraints

Low-cost hardware (under $100), safety/precision needs, and a UI that works for beginners and power users.

Outcome

Created a visual workflow to build and simulate complex motion programs for a desktop robotics controller.

The Inspiration

I spent middle and high school in US FIRST Robotics. Even then it was clear that anyone curious about the field needed a way in that starts with the fun of engineering, not lines of code.

The control systems are open source, so the GUI works with any arm sharing the same joint configuration.

The Goal

An accessible controller for a 3D-printed arm that costs under $100, cheap enough for schools, makerspaces, and hobbyists who were priced out. Powerful tools don't have to be complicated.

Building a Motion

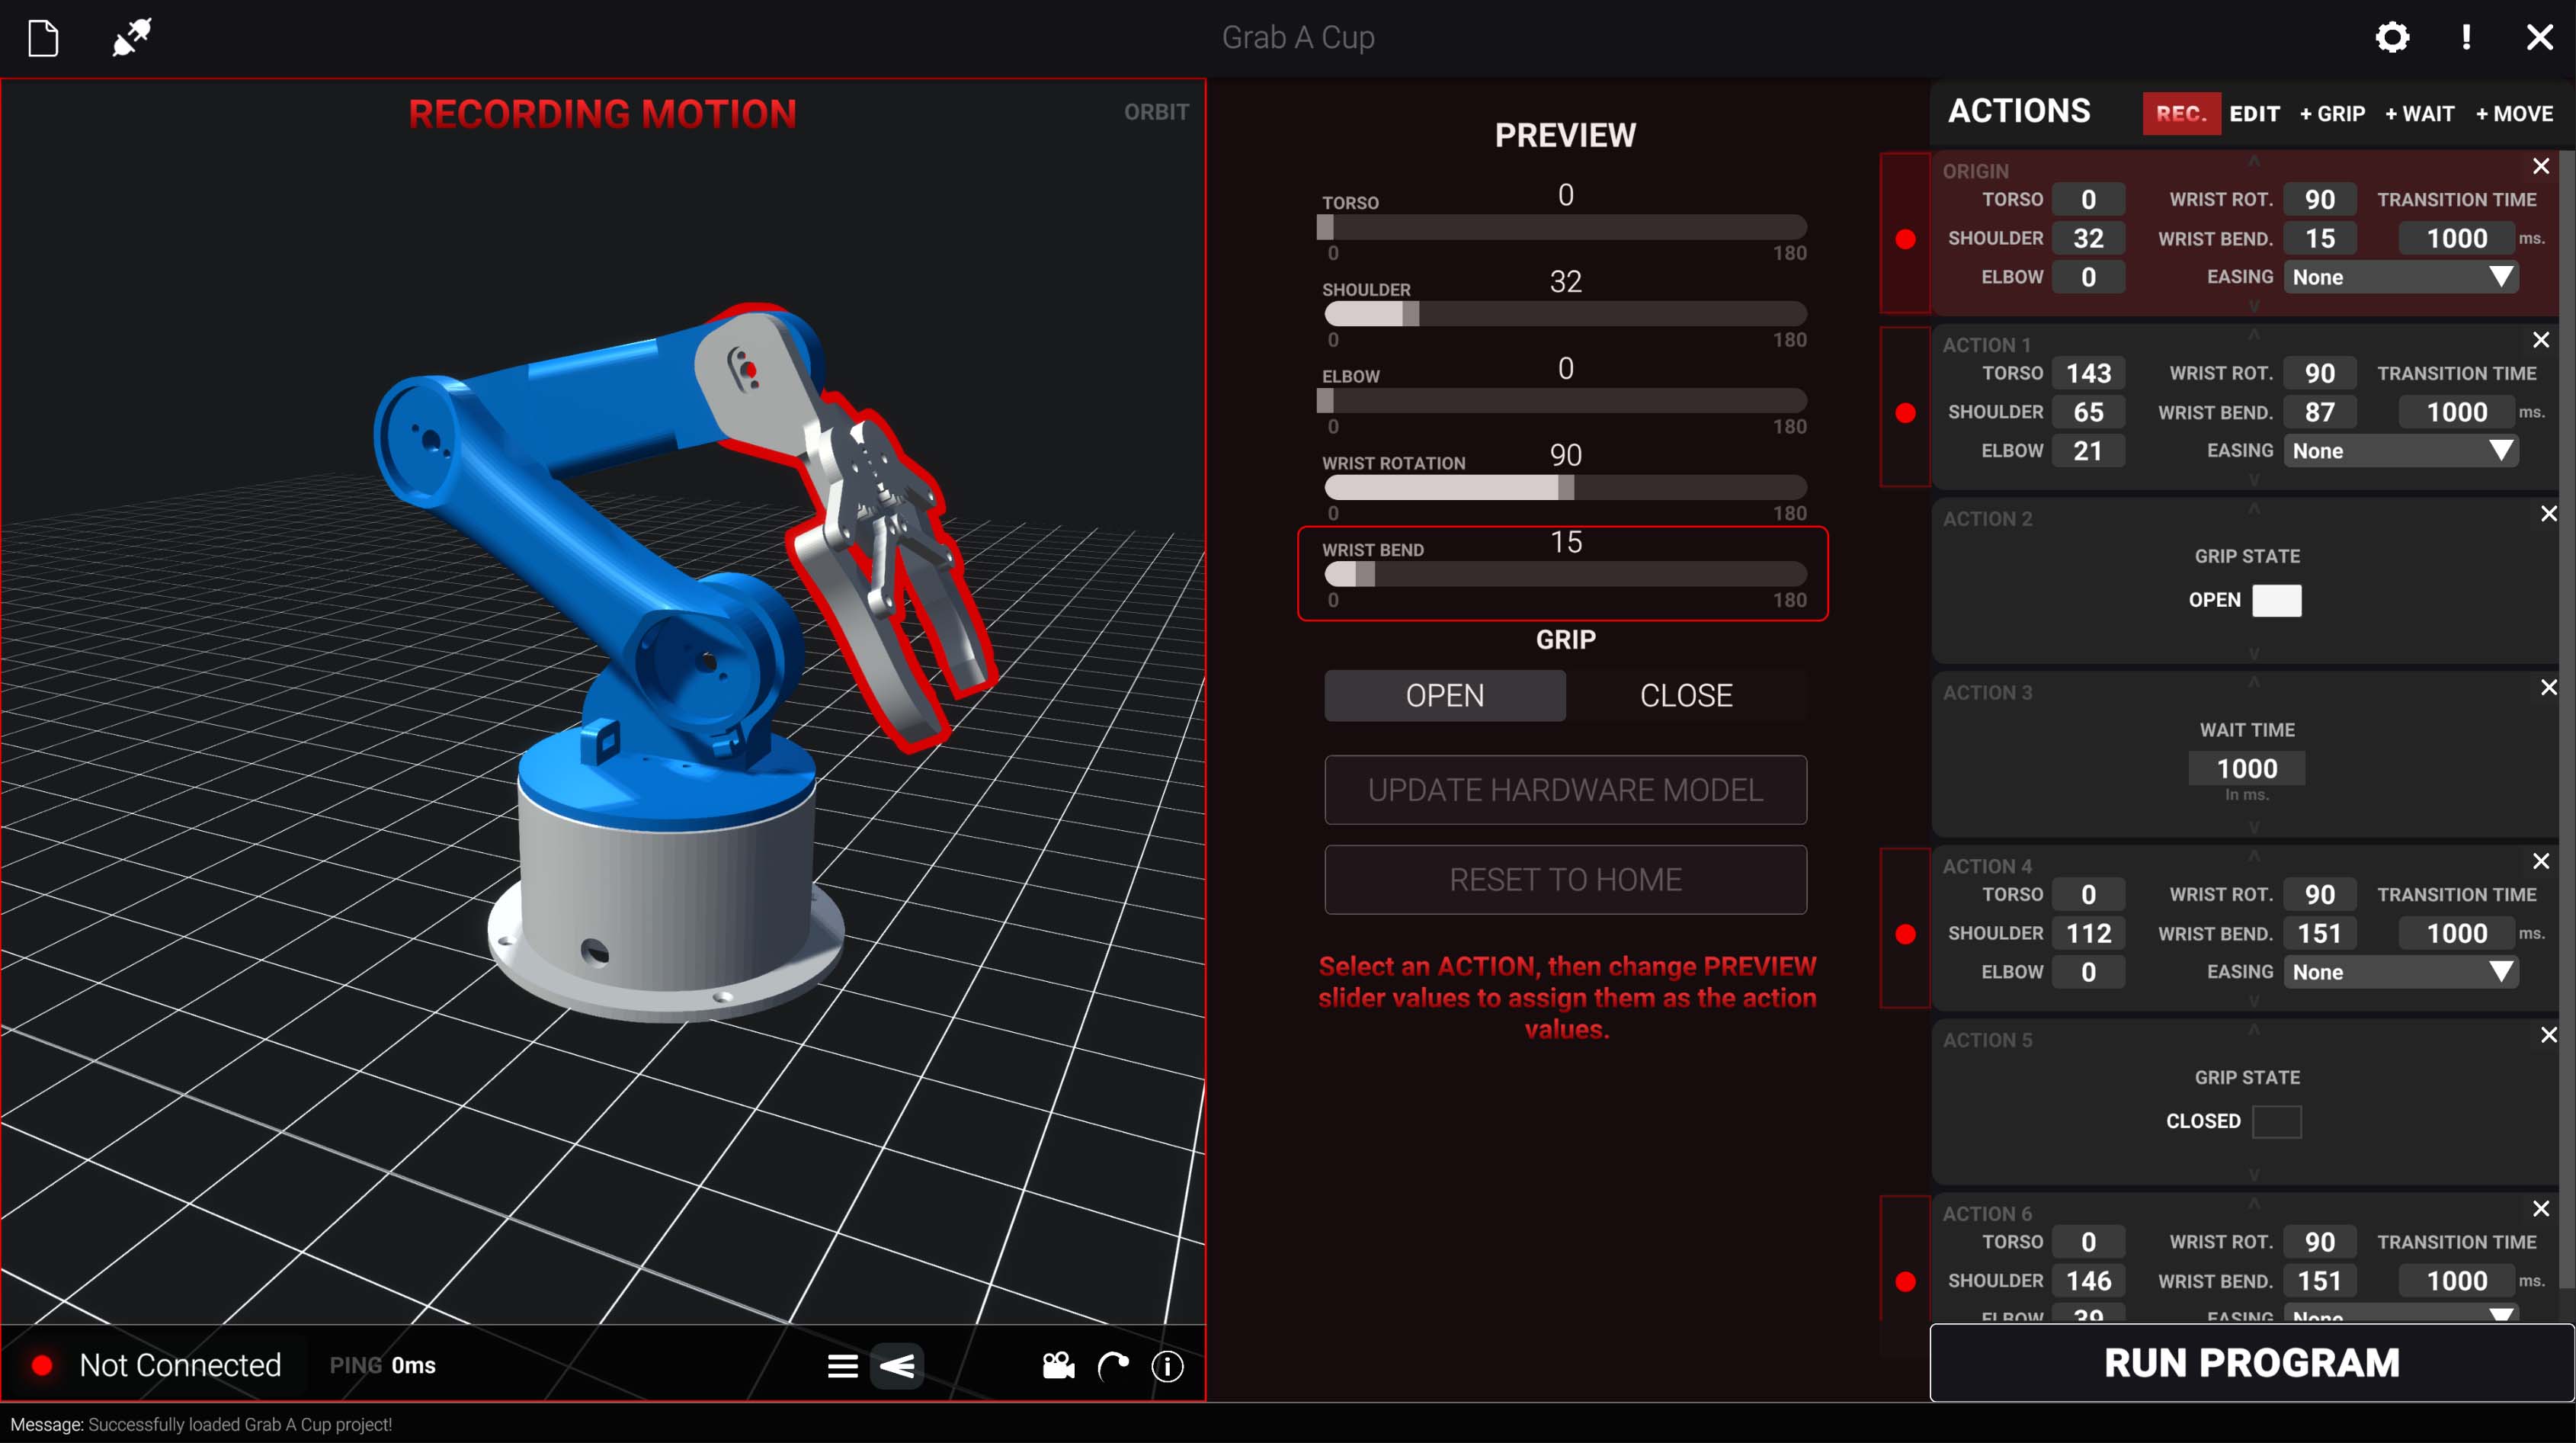
Recording Motion

Borrowing from visual scripting, motions are recorded as a vertical stack of action blocks, each driving servos and gripper states over a set interval.

Recording Motion Interface
Editing Motion Interface

Editing Motion

RECORD captures servo angles and timing. EDIT fine-tunes individual blocks with precise parameters for smooth, controlled movement.

Action Blocks

Each block is one command to the arm: add, remove, adjust, or reorder them freely. RUN PROGRAM plays the sequence on the connected arm, or simulates it if nothing is plugged in. Sequences save and load, so a library of reusable motions builds up over time.

Simulate, Then Run

Intuitive Viewport

Sliders and grip buttons map to the servos, and a simulated preview replaces trial and error. Overlays add servo angles, color-coded motion, and collision detection.

Intuitive Viewport Interface
Diagnostics Screen

Diagnostics

A modal shows which servos have power, and a failing servo blocks physical execution before it can cause damage.

Tooltips & Preferences

Tooltips teach new users; hot keys and preferences serve the experienced ones.

Tooltips and Preferences Interface

Design System

Color Palette

#050505
#0D0D0E
#131217
#363B41
#8C8C8C
#DDDDDD
#DB0B0F
#FFCC36

Typography

Roboto
Aa Light
Aa Regular
Aa Bold

Design Rationale

1. Game-Inspired Viewport Controls

I borrowed viewport patterns from 3D modeling software and games rather than industrial interfaces. Rotate, pan, and zoom with familiar mouse controls and WASD.

2. Visual Scripting Over Code

Action blocks let anyone build complex sequences visually, lowering the barrier for students and hobbyists.

3. Color-Coded Feedback

Each servo keeps one color throughout, from 3D overlay to slider accent, so you always know which joint you're adjusting.

Key Trade-offs

Power vs. approachability

We used visual motion blocks instead of raw code; power users lost fine-grain control but beginners reached success faster.

3D realism vs. usability

We simplified the 3D view with fewer controls to avoid overwhelming novice users.

Cross-platform vs. stability

We focused on Windows first due to hardware constraints instead of splitting effort across operating systems.

Key Takeaway

Complex systems don't require complex interfaces. Students and hobbyists want to experiment and learn by doing, so the action blocks and real-time preview are built for that. With the right interface, anyone can program a robotic arm.